Babylon has released an updated version compatible with 32 bit and 64 bit OS.
This update is free for users who have a valid license for Babylon for Mac version 3 or above.
If you have a license for an older version than V3, a new purchase is required.
To update your Babylon for Mac to the latest version, please follow these steps:
1. Uninstall Babylon from your Mac PC.
2. Download & Install Babylon
- Click here to download and run Babylon installation.
- If you get a message that the setup file can't be opened - follow the instruction here to open it.
- Follow the instruction on the screen till the installation is finished (insert your Mac credentials when requested to confirm installation).
- Babylon will open automatically when the installation is completed.
3. Enter your license Code (for Babylon):
If the license window pops-up after installation is complete – please enter your license details.
It is best to copy and paste the license code in order to avoid mistakes (use CMD+C to copy and CMD+V to paste).

Please Continue activation process as described below.
4. Remove 'Babylon Activation' and 'Babylon' from Accessibility window
- Click on the apple icon on the Menu bar (on the left corner of the window).
- Choose 'System Preferences'.

- Follow the path by clicking on: 'Security and Privacy' >> 'Privacy' >> 'Accessibility'.
'Security & Privacy' window will be shown:
(Apps on the list on the right might differ from one computer to another)
- Click on the Lock sign at the bottom of the window and type your Mac credentials.

- The lock will open
- Highlight 'Babylon Activation'
- Click on the "-" (minus sign) that appear under the list ('Babylon Activation' will disappear).
- If you have 'Babylon' on your list - please remove it as well, the same way as described.
5. Add 'Babylon' app to Accessibility Window
- Open Accessibility window (as described in section 4):
- Click on the + sign that appear under the list
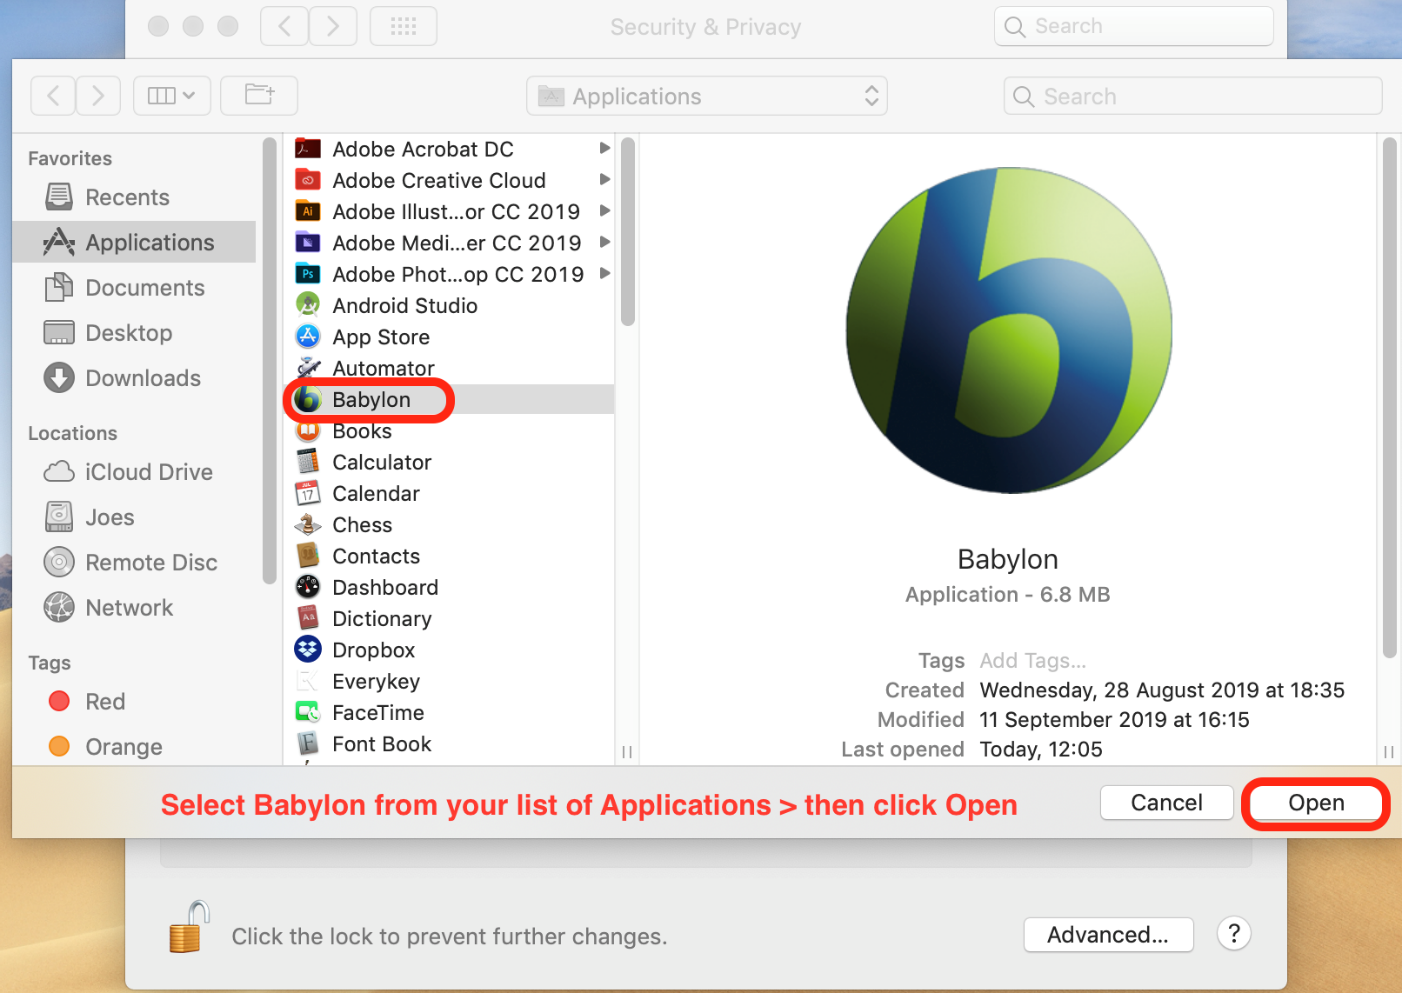
- Choose 'Applications' on the list on the left side bar under Favorites.
- Select 'Babylon' from the list of applications and click on Open.
6. Add 'Babylon activation' to Accessibility window
- Click again on the + sign that appear under the list in 'Accessibility' window.
- Locate 'Babylon Activation' on your computer:
- Look for your hard disk icon on the left bar of the window, under 'Devices' section
(Named HD or Macintosh HD or so). - Follow the path by clicking on:
'HD' >> 'Library' >> 'Application Support' >> 'Babylon' >> 'Babylon Activation' and then click on 'Open'. - 'Babylon Activation' will be added to the list of the activated programs in Accessibility window.


- Look for your hard disk icon on the left bar of the window, under 'Devices' section
- Once done, make sure that 'Babylon Activation' and 'Babylon' are in the Accessibility list with a checked box – as shown below:

- Click on the Lock sign to lock Accessibility.
(Babylon icon will appear in your Dock.)
----------------------------------------------------------------------------------------------------------------------
** In case that your HD isn't displayed under 'Devices' section in the list while trying to locate 'Babylon activation', follow the steps below before locating the module.
- Open Finder
- Click on 'Preferences'
- Go to 'Sidebar' tab and mark 'Hard Disks'.


- Then go back to step 6 - Locating 'Babylon Activation' on your computer.
-------------------------------------------------------------------------------------------------------------------------
7. Restart your Mac
At the end of the installation process, make sure to restart your Mac, so Babylon will function properly.